Brush Holder
|
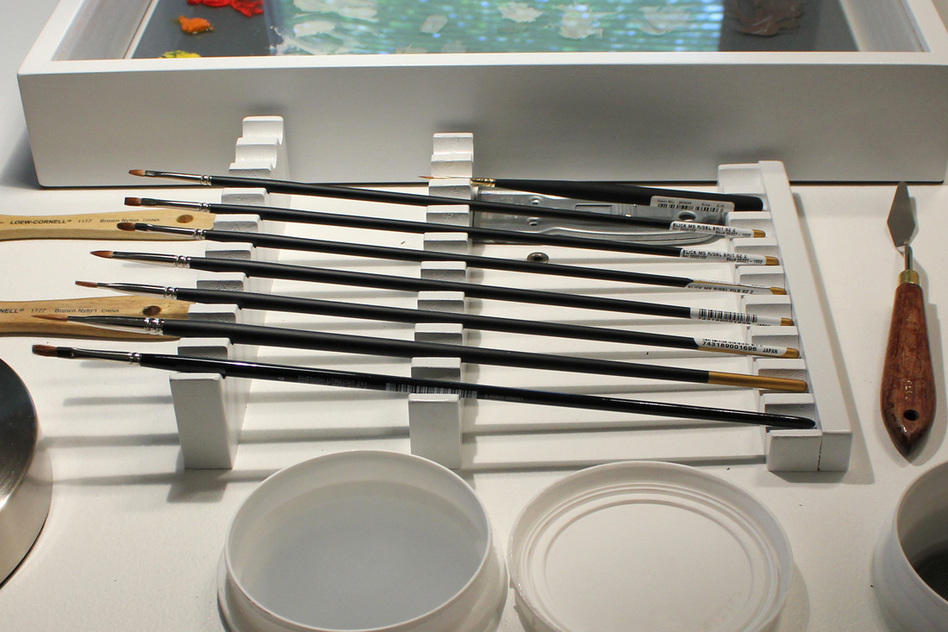
This is one feature on my painting table I don't think I can live without. Before I had a brush holder, my brushes would roll freely on the table and the paint on the bristles would touch each other; something that always annoyed me. It also keeps the brushes angled up which makes seeing them and grabbing the right brush very easy. I barrowed this invention from something similar I saw on an art store website. It was expensive for what it was and I knew I could build something better for less. If you have access to some power tools, its quite simple to make.
If you work with mainly long handled brushes, then you will not need the middle section as shown in the picture. I usually use very small brushes with short handles as well, so I need it.
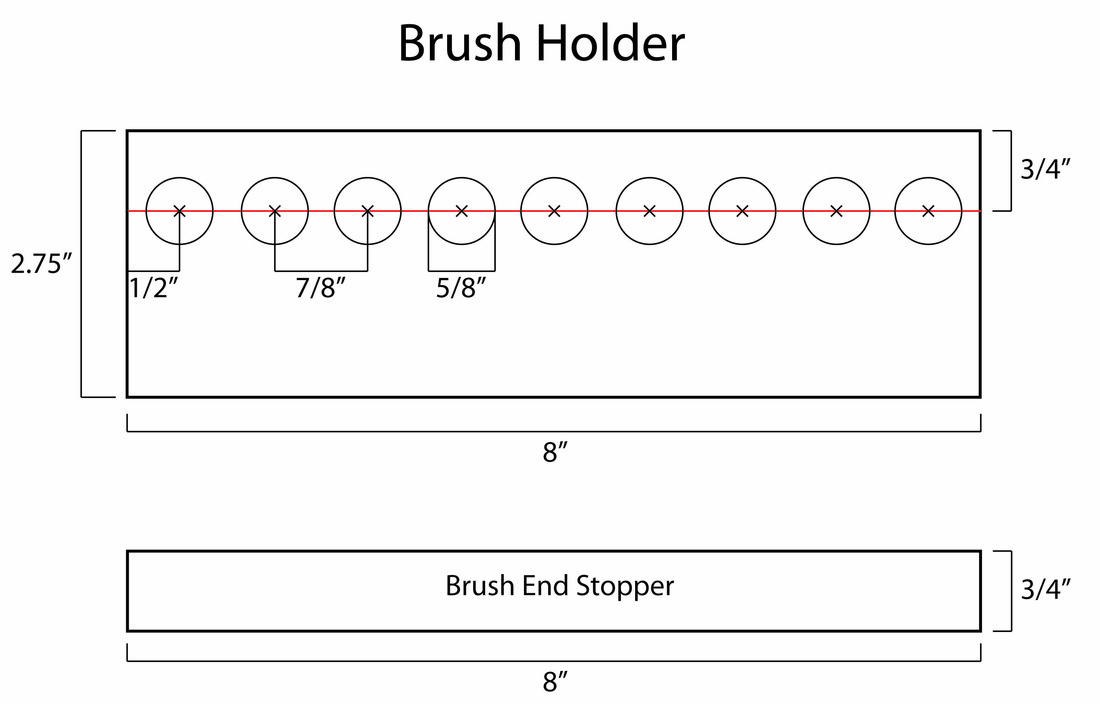
Below is a schematic of the brush holder for long handled brushes. I made mine from a 1" by 3" piece of pine; actual dimensions is 0.75" by 2.75".
|
|
The first step is to cut an 8" section of 1" by 3". You can use a hand saw, but a miter saw is the best option. Next, use a straight edge to draw a parallel line 3/4" from the edge as the red line in the schematic represents. On that line, mark increments (X's) starting 1/2" from the end, then every 7/8". These will mark where the holes will be drilled. You should have 9 evenly spaced marks on the line.
Next drill pilot holes through the 9 marks using a small drill bit. Tip - use an awl or a sharp tool to dent the wood where you intend to drill. This will give the drill bit a place to sit and prevent it from wandering while you are starting the hole. I used a drill press to drill these holes but a hand drill works too. Once you have drilled the pilot holes you will need to enlarge them to 5/8". I found this is a pretty good size to accommodate almost any brush size. You can use a spade bit to drill the 5/8" holes. To prevent tare-outs on the bottom, drill the 5/8" hole halfway through the wood, then flip the board over and drill the rest through from the other side. Do the same for the rest of the holes. After you have all the 5/8" holes drills, you need to cut the piece in two. By using a table saw, or hand saw, cut directly down the 3/4" line (red line) from the edge. Be sure to center the line on the center of the saw blade so you get evenly cut semi-circles. |
The file below will open the schematic in a pdf you choose to print it out as a reference.
| ||
The last step is to cut a 8" piece of wood 3/4" by 3/4". This piece will act as stopper for the brush ends to but up against. You can cut this on a table saw or hand saw from the rest of 1" by 3" you have left over. After you have all three pieces properly cut, clean up the rough edges with sandpaper and give them a coat of paint.
|
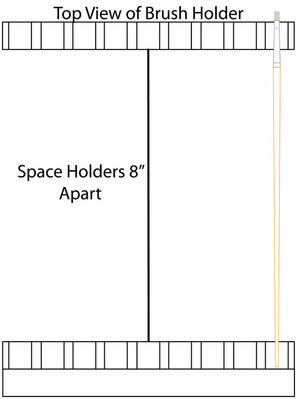
To install the brush holders, space them 8" apart. This is a good distance for long handled brush to fit. Then but the 3/4" by 3/4" stopper piece against the back side of the shorter holder. Once you have them placed correctly on your table, mark their position with a pencil so you can note where to either drill holes or place tape on the table. I secured mine to my table with screws from the bottom, but some strong double side tape will also keep them where you want them.
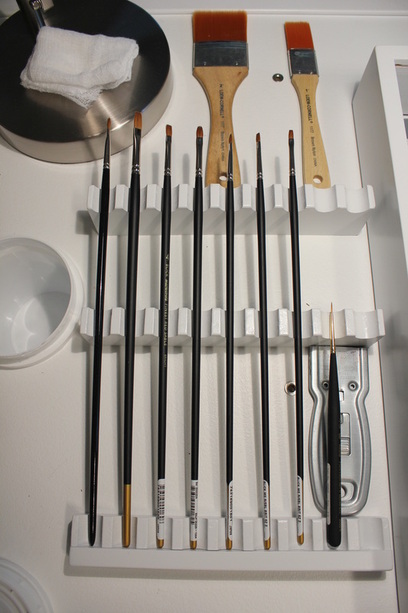
Once you have finished, you should have something like this (below). If you use short handled brushes as well, you will need to make another holder. Make it an overall height of 1.25" - 1.5". Some short handled brushes are fairly short, my miniature paint brushes are very small so you will need to determine the proper height according to your brush. Then mount it in the middle and secure it as you did for the other two. Then enjoy, you just made life easier!
|
|